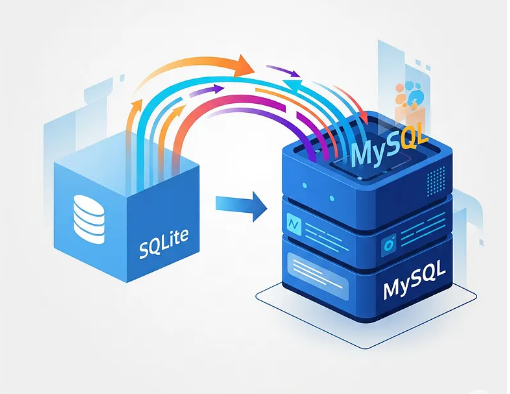
Migrating a database from SQLite to MySQL is a bit like moving from a small, flexible apartment into a more structured, spacious house. SQLite gives you freedom with data types and behaviors, while MySQL enforces stricter rules—so the migration requires preparation, translation, and careful verification.
Prepare the Environment
The process begins with environment setup. You’ll need both systems available: SQLite for reading the original data and MySQL to receive the migrated schema and content. It’s always wise to take a backup of your SQLite file before you touch anything, just to ensure you can revert if something unexpected happens.
Install Required Tools:
- MySQL Server (or MariaDB)
- MySQL client or a GUI tool (MySQL Workbench, DBeaver, phpMyAdmin)
- SQLite CLI
Backup SQLite database:
cp mydb.sqlite mydb_backup.sqlite
Convert SQLite Schema to MySQL
Once everything is ready, the first real task is to understand the schema you’re working with. SQLite’s permissive nature means that things like data types are often loosely enforced—they might be declared one way but used another. By running SQLite’s .schema command, you can inspect the structure of the existing tables and prepare for how they’ll need to be translated into MySQL’s more rigid model.This means:
- TEXT, INTEGER are fine.
- BOOLEAN becomes TINYINT(1)
- REAL becomes FLOAT or DOUBLE
- BLOB stays BLOB
- DATETIME often becomes DATETIME or TIMESTAMP
- AUTOINCREMENT handling differs.
Once the schema is converted, you import it into the MySQL server:
mysql -u root -p mydb < schema_mysql.sql
If the translation was done well, MySQL will create each table without complaints. If it doesn’t, this is usually where the first problems appear: unsupported types, invalid constraints, or missing primary keys. Fixing these early is essential, because they will affect how data is imported later.
Check thattables created successfully in MySQL:
SHOW TABLES;
Migrate the Data
With the structure in place, attention shifts to the data itself. SQLite can produce a dump of all table content, typically as INSERT statements. Here is how to export data from single table:
sqlite3 mydb.sqlite “.mode insert” “.output data.sql” “select * from table_name;”
And this statement can export the entire SQLite database:
sqlite3 mydb.sqlite “.dump” > data_sqlite.sql
However, these dumps include SQLite-specific elements like BEGIN TRANSACTION or PRAGMA statements that MySQL can’t digest. They need to be removed; you can use sed tool for this purpose:
sed -i ‘s/BEGIN TRANSACTION;//g’ data_sqlite.sql
sed -i ‘s/COMMIT;//g’ data_sqlite.sql
sed -i ‘/PRAGMA/d’ data_sqlite.sql
In addition, MySQL is picky about things like NULL values, date formats, and escaped characters—so the data dump might require cleaning. Some problems will only show up at import time, revealing themselves as syntax errors or constraint violations.
Importing the data into MySQL is usually the longest step, especially for larger databases. You can run it from MySQL CLI as follows:
mysql -u root -p mydb < data_sqlite.sql
Fix Common Migration Issues
SQLite lets any table have a rowid; MySQL may not.Ensure primary key is defined correctly:
id INT AUTO_INCREMENT PRIMARY KEY
Sometimes foreign keys must be disabled temporarily, because MySQL enforces relationships strictly even during imports:
SET FOREIGN_KEY_CHECKS=0;
— import data
SET FOREIGN_KEY_CHECKS=1;
Fields defined as BOOLEAN in SQLite must be converted to TINYINT(1) to avoid type mismatches.
Invalid dates like 0000-00-00 need to be replaced with actual nulls.
If you get truncation errors like ‘text column size too small’, change data type to TEXT:
ALTER TABLE table_name MODIFY column_name TEXT;
Each warning or error serves as a clue about how the SQLite data differs from MySQL’s expectations.
Verify the Migration
Once the data is in, you arrive at the important verification stage. You compare row counts between SQLite and MySQL:
SELECT COUNT(*) FROM table_name;
Review the MySQL table definitions to ensure indexes, primary keys, and foreign keys were recreated accurately:
SHOW CREATE TABLE table_name;
Spot-checking real data makes this process significantly more trustworthy.
SELECT * FROM table_name LIMIT 20;
Clean Up and Optimize MySQL Database
After the core migration is complete, you can clean up and optimize the new MySQL environment. You may choose to adjust column types for better performance:
ALTER TABLE … MODIFY COLUMN … ;
Add indexes that SQLite never enforced:
CREATE INDEX idx_col ON table(col);
Switch tables to the InnoDB engine with utf8mb4 encoding:
ALTER TABLE table_name ENGINE=InnoDB DEFAULT CHARSET=utf8mb4;
These finishing touches help ensure the new database is efficient and scalable.
Finally, if the database supports an application, you connect the application to MySQL and test it thoroughly:
- Connections
- Queries
- Writes
Queries that were tolerated by SQLite—especially ones that relied on loose typing—might behave differently in MySQL. Catching these early prevents production issues later.
Conclusion
In the end, the migration is a straightforward journey: export, translate, load, verify, refine. The key is understanding the differences between the two systems and taking the time to reconcile them. Once the process is complete, you’ll have all your data safely running on MySQL, ready for heavier workloads, more complex queries, and robust multithreaded usage that SQLite wasn’t designed to handle.
Read Also: westernbusiness.co.uk