How to Print and Cut Photo Stickers with Perfect Precision Using Liene PixCut S1
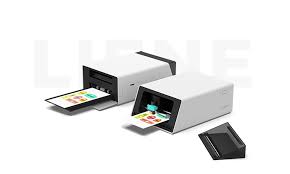
Photo stickers have become increasingly popular in recent years, thanks to their versatility and personal touch. From decorating journals and laptops to creating personalized gifts and business branding, photo stickers offer a fun and creative way to express yourself. However, achieving perfect precision in printing and cutting these stickers can be challenging, especially when using separate devices or manual cutting methods.
The Liene PixCut S1 is a revolutionary sticker printer and cutter designed to simplify this process. It combines high-quality printing with AI-powered precision cutting in one compact device, making it easier than ever to produce flawless photo stickers at home or for your business. In this guide, we’ll explore how to use the Liene PixCut S1 to create photo stickers with perfect accuracy, step-by-step. If you’re eager to read more about how this all-in-one machine can enhance your creative projects, keep going!
Introduction to Photo Sticker Printing and Cutting
Photo stickers are essentially custom prints featuring your favorite images or designs, paired with a sticky backing. Their popularity spans from casual hobbyists decorating planners and scrapbooks to entrepreneurs creating unique product labels.
One of the biggest hurdles in photo sticker production is achieving precise cutting. Misaligned cuts or ragged edges can spoil the look of even the best prints. Traditional methods often involve printing with one machine and manually cutting with scissors or a separate cutter, which is time-consuming and prone to errors.
The Liene PixCut S1 addresses these challenges by integrating printing and cutting into a seamless workflow. With AI-driven cutting technology, it reads printed designs and cuts them with pinpoint accuracy. This allows users to create professional-quality stickers efficiently and with minimal effort.
Setting Up Your Liene PixCut S1 for Photo Sticker Production
Before diving into printing, proper setup is crucial for optimal results.
- Unboxing and Device Setup: The Liene PixCut S1 comes ready to use with minimal assembly. Simply plug it in and turn it on.
- Installing and Connecting the App: Download the Liene PixCut S1 app on your smartphone or tablet. This app is the control center for designing, printing, and cutting your stickers.
- Preparing Sticker Materials: Choose appropriate sticker media, such as high-quality sticker paper or 4×6 photo paper, depending on your project needs. Loading your material correctly into the Liene PixCut S1 ensures smooth printing and cutting.
Designing Your Photo Stickers
Creating the perfect design is key to producing stunning photo stickers.
- Using Built-in Templates: The Liene PixCut S1 app includes a rich library of templates that you can customize with photos, text, and graphics. This is perfect for beginners or those looking for inspiration.
- Uploading Personal Photos and Artwork: For more personalized projects, you can upload your own images. Make sure your photos are high resolution for the best print quality.
- Optimizing Image Quality and Size: Adjust brightness, contrast, and size within the app to ensure your stickers look vibrant and clear once printed.
Step-by-Step Guide to Printing Photo Stickers with Liene PixCut S1
Here’s how to bring your designs to life:
- Load Sticker Paper Properly: Ensure your sticker paper or photo paper is fed correctly into the machine to prevent jams or misalignment.
- Adjust Print Settings: Within the app, set the appropriate print quality, color saturation, and size for your stickers.
- Start Printing: Send your design from the app to the Liene PixCut S1 and watch it produce crisp, colorful prints.
Achieving Perfect Precision Cutting
This is where Liene PixCut S1 truly shines.
- AI-Driven Cutting Technology: After printing, Liene PixCut S1’s sensors scan the printed outlines on the sticker sheet and the AI algorithms calculate precise cutting paths. This eliminates guesswork and ensures each sticker is cut perfectly.
- Aligning Print and Cut Functions: The app guides you through calibration steps to match print and cut alignment perfectly.
- Troubleshooting Common Issues: If you notice misaligned cuts, check that your sticker paper is properly loaded and clean the sensors if necessary. The Liene PixCut S1 app also provides easy troubleshooting tips.
Post-Production Tips
After printing and cutting:
- Peeling Stickers Carefully: Slowly peel stickers from their backing to avoid tearing or damaging edges.
- Storing and Packaging: Store your stickers flat in a cool, dry place. If selling, consider packaging them in protective sleeves or envelopes to maintain quality during shipping.
- Creative Uses: Use your photo stickers on journals, laptops, phone cases, packaging, or as promotional giveaways.
Why Choose Liene PixCut S1 for Photo Stickers?
- Integration of Printing and Cutting: The all-in-one design reduces equipment needs and saves space.
- User-Friendly Interface: The Liene PixCut S1 app makes designing, printing, and cutting accessible to users of all skill levels.
- Cost-Effective: By producing stickers at home, you save on outsourcing costs and can print on demand.
- Scalable for Businesses: Whether you’re a hobbyist or running a small business, Liene PixCut S1 grows with your needs.
Conclusion: Elevate Your Craft with Perfect Photo Stickers from Liene PixCut S1
If you’re looking for a reliable sticker printer and cutter that delivers flawless photo stickers, the Liene PixCut S1 is a fantastic choice. Its seamless integration of high-quality printing and precision cutting enables you to create professional, custom stickers with ease.
Ready to read more and get started? Explore the features of Liene PixCut S1 and start producing photo stickers that impress every time!